

1: INITIAL SKETCH AND OVERLAY (Line Weight: light)
After choosing a final design, I check the perspective by reversing the page and looking through it using a lamp. I use axle lines in order to make sure that my wheels are within perspective (a). The minor axis should be perpendicular to the major (or axle line) axis (b).In order to check surfaces, I draw contour lines (c and d) along the X and Y axis while going over every surface change. Just like the wheels, notice the axis lines along the headlights in order to make sure that the ellipses for the headlights are correct (e).

2: PERIMITER LINE WEIGHT (Line Weight: heavy)
The perimeter line weight will probably be the thickest to help pull the image off the page and emphasize the overall silhouette– it should be darkest towards the undercarriage.

3: SURFACE SEPARATION (Line Weight: medium)
The third step is to separate all major surface changes, such as the hood, cowl, grilles, vents, and separation lines. NOTE: Most surface breaks on vehicles are rounded or have some sort radius. To visually emphasize this; instead of using a single line (which indicate a sharp, acute surface break), two parallel lines should be used to indicate a radius on the edge (f).
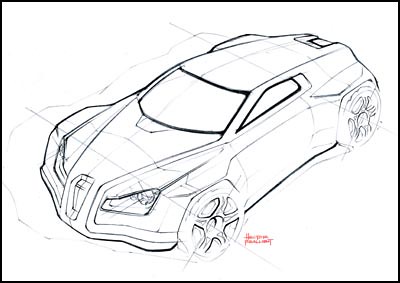
4: GLASS DETAILS (Line Weight: heavy)
A rather heavy line weight is used around the glass area to indicate seals, material separation as well as emphasis on the DLO (Day-Light-Opening). (g)
From http://www.designertechniques.com/
No comments:
Post a Comment